Showing posts with label Magazine. Show all posts

22 March 2011

Italian Bread at Home....

So the other week, I asked my husband if he wanted to try this Italian Country loaves recipe that I found in a old magazine, which I had saved for all the recipes that were in it. My husband's the bread guy in our family he makes such delicious breads. I'm still nervous myself to make bread, but I'm thankful he likes to do it. *happy smiles*

So we tried the recipe and it came out really good! We were surprised that it really wasn't that hard of a recipe. It was just very time consuming. But it's really good dipping bread, like the kind you get at an Italian restaurant with the olive oil. Also, this recipe makes two big loaves. So you can always share with a friend!

Hope you all like the bread! Enjoy!


Italian Country Loaves
(From the Better Homes and Gardens – Holiday Cooking 1997)
Makes two loaves.

Ingredients:

1 cup warm water (105 degrees to 115 degrees)
1 package active dry yeast
2 cups unbleached all-purpose flour
2/3 cup milk
1 teaspoon sugar
1 ¾ cups warm water (105degrees to 115 degrees)
1/3 cup olive oil
1 tablespoon snipped fresh rosemary or 1 teaspoon dries rosemary, crushed
2 cloves garlic, minced
2 teaspoons salt
7 to 7 ½ cups unbleached all-purpose flour
Cornmeal
Fresh rosemary sprigs (optional)
Olive oil (optional)

Directions:

Stir together the 1 cup warm water and the yeast in a large mixing bowl. Let stand about 3 minutes or till mixture looks creamy. Stir in the 2 cups flour, ¼ cup at a time; the milk; and sugar. Cover and set in a warm place for 4 to 24 hours or in the refrigerator up to 4 days.

Beat the 1 ¾ cups warm water, 1/3 cup olive oil, rosemary, garlic, and salt into the yeast mixture with a freestanding electric mixer on low speed or with a wooden spoon. Beat in as much of the 7 to 7 ½ cups flour as you can.

Turn out dough onto a lightly floured surface. Knead in enough of the remaining flour to make a moderately stiff dough that is smooth and elastic (6 to 8 minutes total). Shape dough into a ball. Place in a greased bowl, turning once to grease surface. Cover and let rise in a warm place till double (2 to 3 hours).

Punch down dough. Turn out onto a lightly floured surface. Divide dough in half. Shape each half into a round loaf, pulling the top surfaces tight and pinching any seams together under the loaves. Place on a large greased baking sheet sprinkled with cornmeal (or on parchment paper, if using a bread stone). Cover and let rise till nearly double (about 1 hour).

Adjust two oven racks so one is in the lowest position and the other is in the middle of the oven. Heat oven to 400 degrees. If using a bread stone, place it on the middle and preheat stone for 30 minutes. Rub loaves lightly with flour. With a sharp knife or clean razor blade, cut a crisscross design atop each loaf, about ¼ inch deep. If desired, brush rosemary sprigs with olive oil, and place on top of loaves.
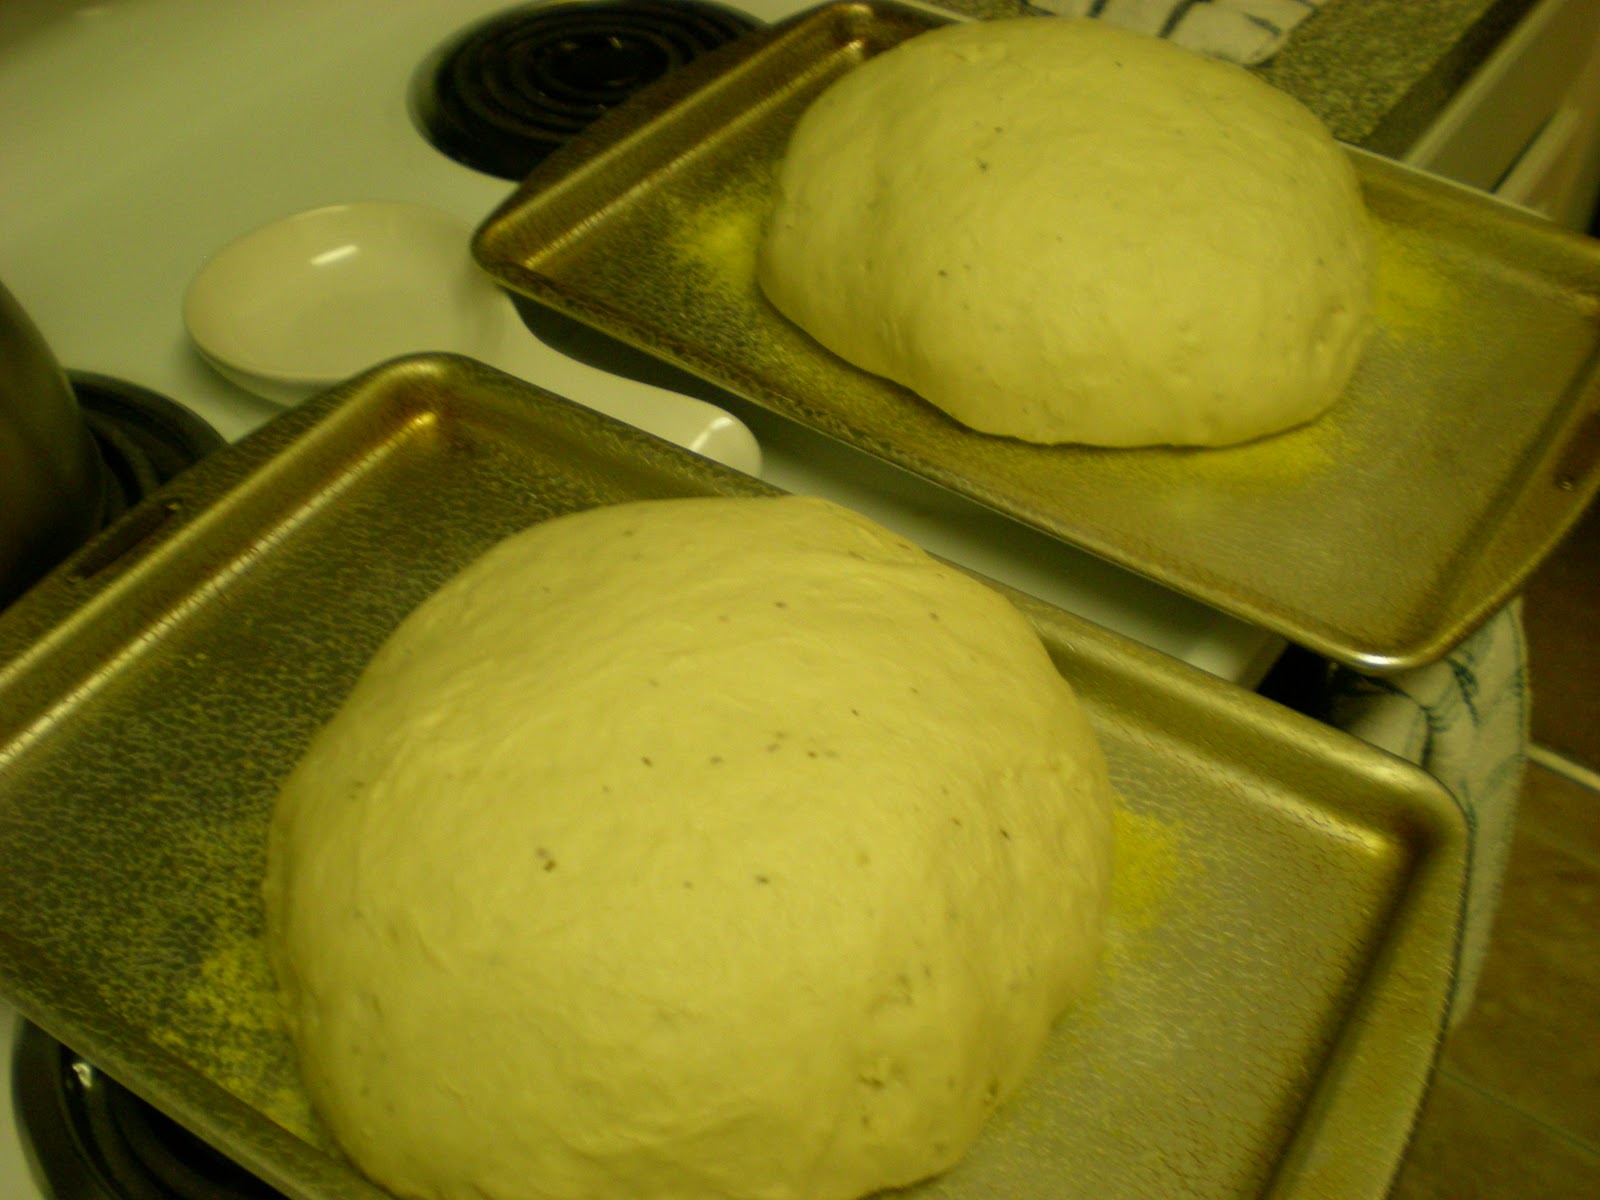


Images from Me; Recipe from Better Homes and Gardens - Holiday Cooking 1997

05 March 2011

Trouble With Some Cheesecake....

So I tried my first hand at making homemade cheesecake the other day. Never done this before. I've always just made them from the box. *Smiles* But I got in the mail last week the King Arthur Flour's the baker's catalogue, and it had a recipe for vanilla bean cheesecake bars. So yummy looking! So I decided to try it.

It's a pretty easy recipe to follow. However, it's not good to make your first homemade cheesecake at the same time... that you're trying to listen to a late night conference call. Doesn't work very well. I ended up putting one teaspoon of lemon zest in the cheesecake, instead of 1/2 a teaspoon. I put the cheesecake in for 34 mins., but it was still very wobbly in the middle of the cheesecake. So I ended up putting it in there for 6 mins. more. Then 6 more mins. Then a few more. Then my husband had to watch it cause I got pulled away. And well... we cooked it a little too long. Well, I think we did since it doesn't look like the picture.

So some advice for everyone. Please do not over cook your cheesecake. Watch your cheesecake, and don't listen to calls at the same time you're making your first cheesecake.

Oh well, it did taste really good! That's all that matters. Enjoy everyone!


Vanilla Bean Cheesecake Bars
(from King Arthur Flour)

Yield: 16 servings.

Ingredients:
Crust:
- 1 1/4 cups graham cracker crumbs, about 8 whole crackers
- 4 tablespoons confectioners' sugar
- 1/8 teaspoon salt
- 1/8 teaspoon ground cinnamon
- 5 tablespoons melted butter

Batter:
- 16 ounces (2 large packages) cream cheese, room temperature
- 1 cup granulated sugar
- 1/4 cup heavy cream or sour cream
- 3 large eggs
- 2 to 3 teaspoons Vanilla Crush or vanilla extract
- 1/2 teaspoon freshly grated lemon peel, optional
- 1 teaspoon lemon juice, optional

Directions:
1) Preheat the oven to 375°F.
2) To make the crust: Stir together the crumbs, sugar, salt, cinnamon, and melted butter.
3) Press into the bottom and about 1/2" inch up the sides of an 8" x 8" square pan.


4) Freeze for 15 minutes if using a metal pan (not necessary if using ceramic or glass). Note: this is to prevent the edges of the crust from slumping. If you're not worried about slumping (and in our testing, it only happened some of the time), you can skip this step.
5) Bake the crust for 8 to 10 minutes, until set; the color won't change much.
6) Remove the crust from the oven and cool for a few minutes while you lower the oven temperature to 325°F.

7) To make the batter: Mix the cream cheese and sugar together until smooth.


8) Add the cream, eggs, vanilla, lemon zest, and lemon juice; mix until combined, scraping the sides and bottom of the bowl as you mix.
9) Spoon the batter into the crust.


10) Bake the bars for 30 to 40 minutes, until the filling is set but still soft in the center. An instant-read thermometer, inserted into the filling about 1" in from the edge, will read about 180°F.


11) Remove the bars from the oven, and cool at room temperature for 30 minutes. Refrigerate until ready to serve.
12) Just before serving, top with fresh berries, fruit pie filling, or whipped cream.


Images from Me; Recipe from King Arthur Flour

23 January 2011

Loving Chocolate Cups....

So I got the new February Martha Stewart Living magazine the other day in the mail. In the section  'Good Things,' I found a small recipe on making your own homemade peanut butter and chocolate cups. Just to tell you now...I LOVE peanut butter! Just love it! So I decided to try the recipe. Enjoy!


Peanut Butter & Chocolate Cups

1 bag of bittersweet chocolate
1 jar of peanut butter
1 can of un-salted peanuts

Baking cups
Cupcake pan

(NOTE: These chocolate cups can be used for more than just peanut butter. You can fill with fruit, mousse, etc.)

Directions:
1. Melt chocolate either on a double boiler or in the microwave.


2. Use a food safe brush to paint the chocolate on the inside of the small baking cups.


3. Refrigerate until set (about 10 mins).
4. Chop up a small bowl of peanuts. (Food processor can help with this.)


5. Repeat, brushing on another layer and chilling.  (NOTE: Make sure the sides have a good thick layer on them.)
6. When firm, peel off paper, and fill.  (NOTE: Be careful peeling off the paper. Cups can break on the sides if they aren't thick enough. It happened to many of mine.)
7. Use a pastry bag fitted with a star tip to pipe in the peanut butter.
8. Garnish with chopped toasted peanuts.


Images from Me; Recipe from the February Martha Stewart Living magazine

01 March 2010

No Plastic For My Monday Lunch

It's another Monday work day. So it made me think of an article, that I found, yesterday while I was cleaning out magazines. The article is call 'Ditch Your Plastics!' by Anna Lee Boschetto and Kasia Kurek from the December 2009 Oxygen Magazine.
I've been coming very health minded in the last few years, especially with the editing out of BPA products in our home. This article bring to light some of the alternatives we have to using plastic containers for holding our food.

Here some alternative choices:
ECO lunchbox Stainless-Steel Lunch Box = $22

LunchBots Pico Stainless Steel Lunch Container = $12.99

GlassLock 10-pc. Storage Set = $49.98

Stainless Steel Lunch Bundle = $26.99

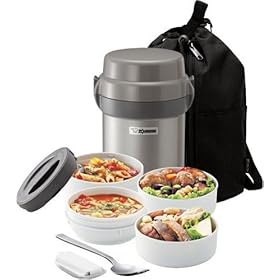
Zojirushi Mr. Bento Stainless Steel Lunch Jar = $45.18

Personalized Bridesmaids Lunch Tote = $14.99

27oz Klean Kanteen® Classic = $17.95

REMEMBER: The number '7' indicates presence of BPA. Toss it. (The number 2, 4, or 5 are BPA free.)


Images from REI.com, Amazon.com, Target.com, Your Guide to Green, American Bride, Klean Kanteen
Article from Oxygen Magazine  
Related Posts Plugin for WordPress, Blogger...